
PSYCH486.HLP
CLIMax command-line helper Connecting to the Internet .desktop categories .desktop files Enhancements Keyboard Shortcuts Opening files Passwords and locking Printer help QEMU Ripping discs Searching programs and files Updating the applications menu FrogFind! - a search engine for vintage computers More...
Documentation
Installation Help
Click the images within each step below to open a larger version.
If you have an old and "buggy" partition or an unformatted hard drive and need to create partitions (EXT2 recommended), you will unfortunately need to do this ahead of time using another GNU/Linux distribution as GParted and other similar tools on PsychOS486 are broken at the moment. Click here to look at i486DX-friendly options if needed for this. I currently have no idea why this is and Slacko Puppy 5.3.1 (MD5) that PsychOS486 is based on's GParted works just fine.
Also, please do not not ask for an isohybrid or some form of "you can simply these files to the ISO blah blah blah..." You may have either thrown away your old computer or are too young to have ever owned one, but the "PsychOS486" distro will remain as a CD-ROM, i486DX/i586/i686 friendly ISO. If your computer does not have a CD-ROM drive, it is not the target. However, if you absolutely need USB help, please take a look at these USB Boot Instructions. If it still doesn't work and you are "hell-bent" on getting it to run on a newer computer, also make sure to turn secure boot off. Don't hate me, hate UEFI.
The following installation instructions assume a single GNU/Linux distribution install on a single partition.
Step 01 - Puppy universal installer
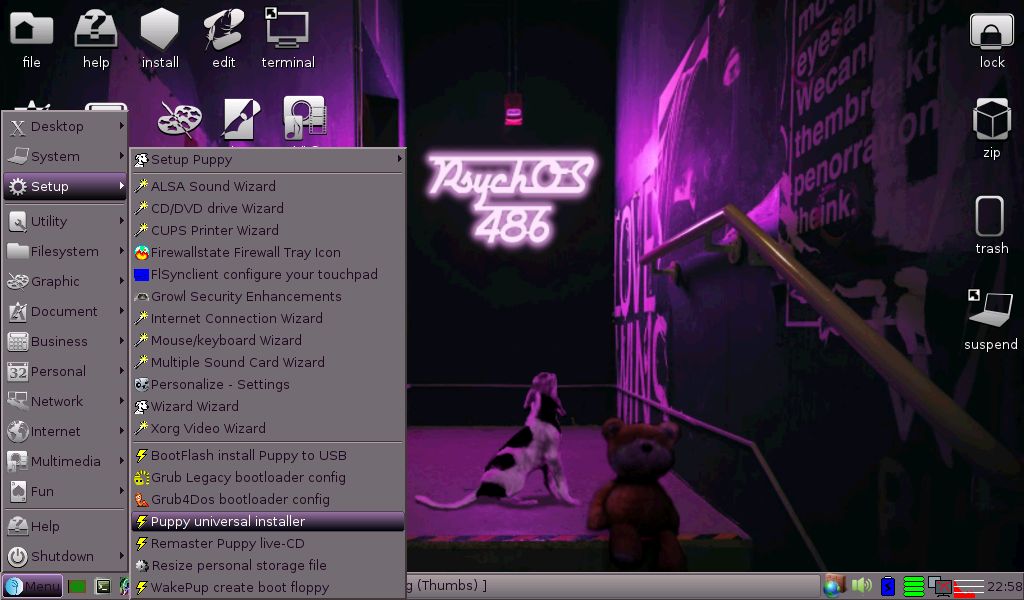
From the applications menu in JWM (preferred), select "Puppy universal installer." This is because PsychOS486 is based on Slacko Puppy 5.3.1.
Step 02 - Choose media
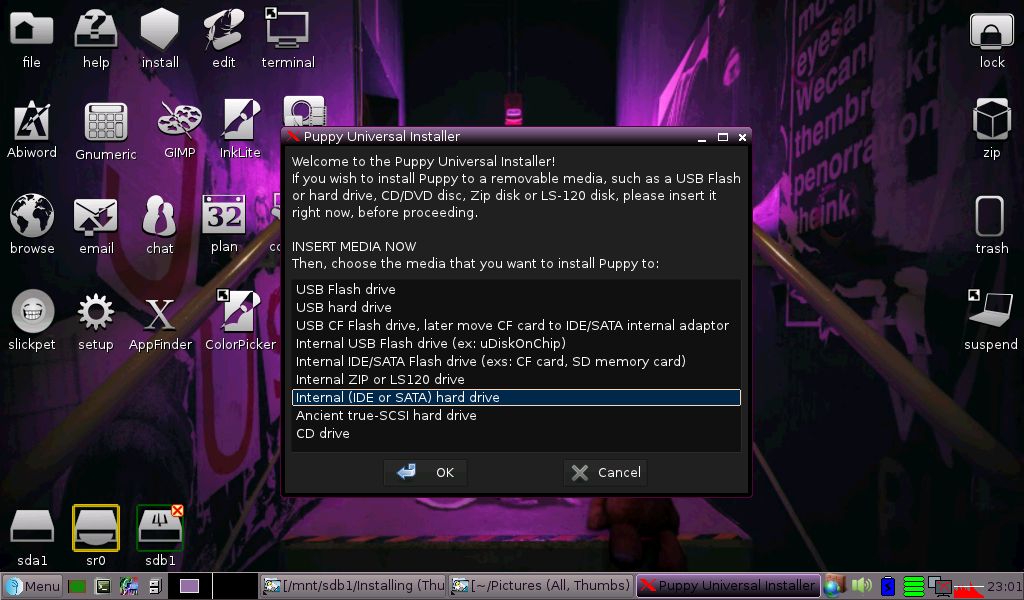
Choose the type of media you are installing PsychOS486 to. Most likely, you are going to want to choose the "Internal (IDE or SATA) hard drive" option.
Step 03 - Choose which drive
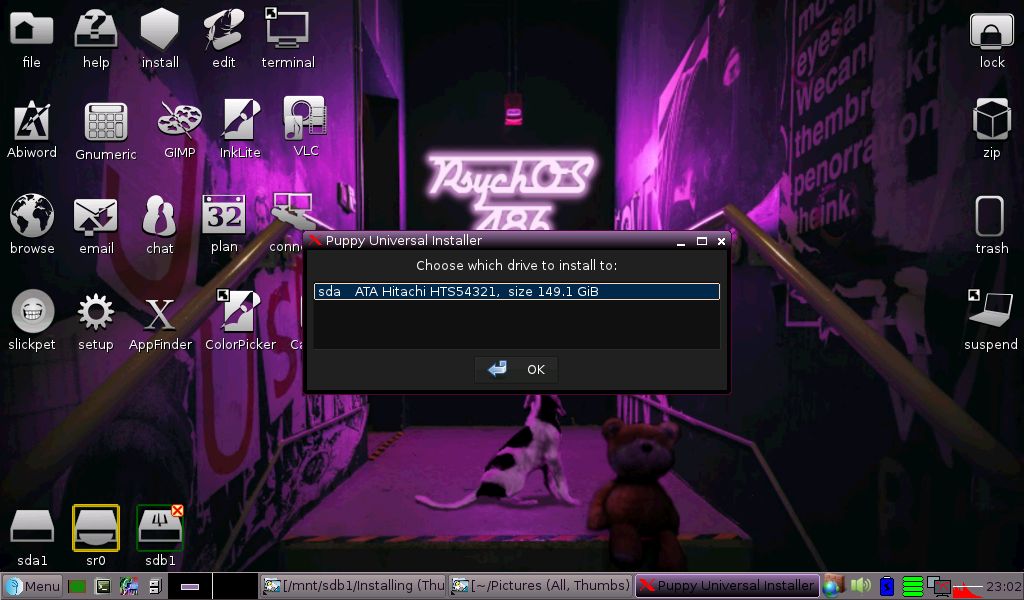
Choose the [hard] drive you want to install PsychOS486 to.
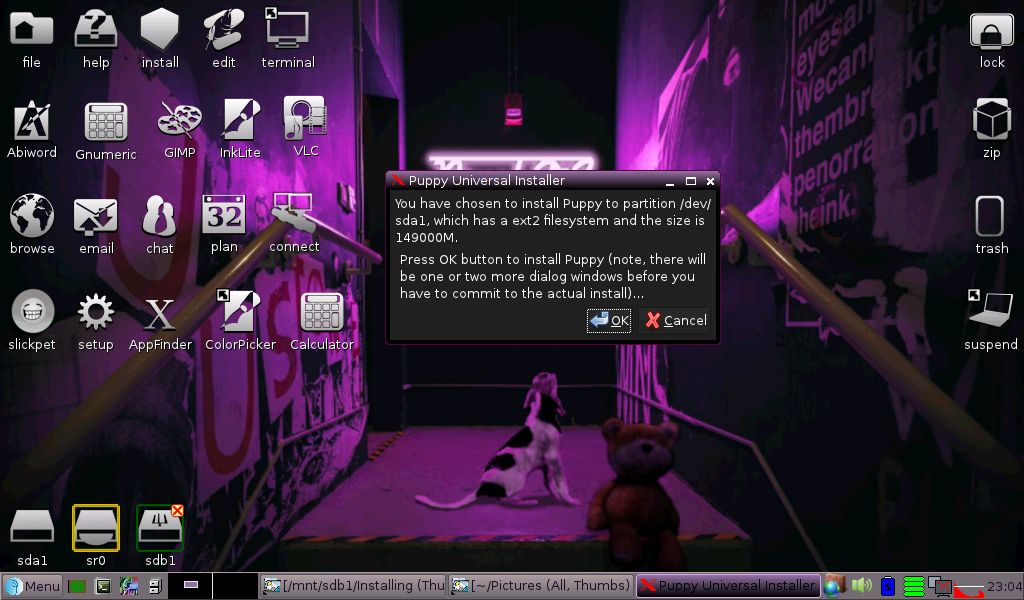
Step 04 - Select partition

GParted and other partition editors, for whatever reason, seem to currently be broken on PsychOS486; however, they are not needed as long as there is a partition already in existence that PsychOS486 does support and can simply just wipe all of the files instead of formatting. Notice the selected button in blue "Install Puppy to sda1:".
Step 05 - Double-check correct partition
The option that was selected in the previous step. Because GParted is broke and the desired partition is formated already anyway, clicking "OK" signifies that the installer is to simply wipe out the contents of the previously selected partition, without formatting, and install PsychOS486 in their place.
Step 06 - Choose Full
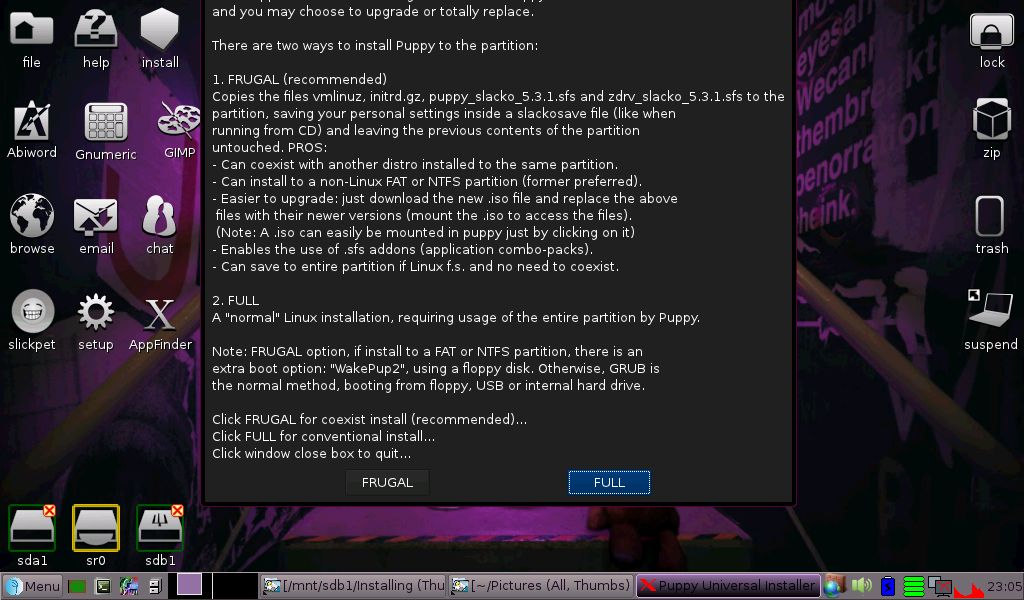
This guide is to help you do a full installation of PsychOS486 and so the "Full" installation option is chosen.
Step 07 - Wipe or Upgrade?
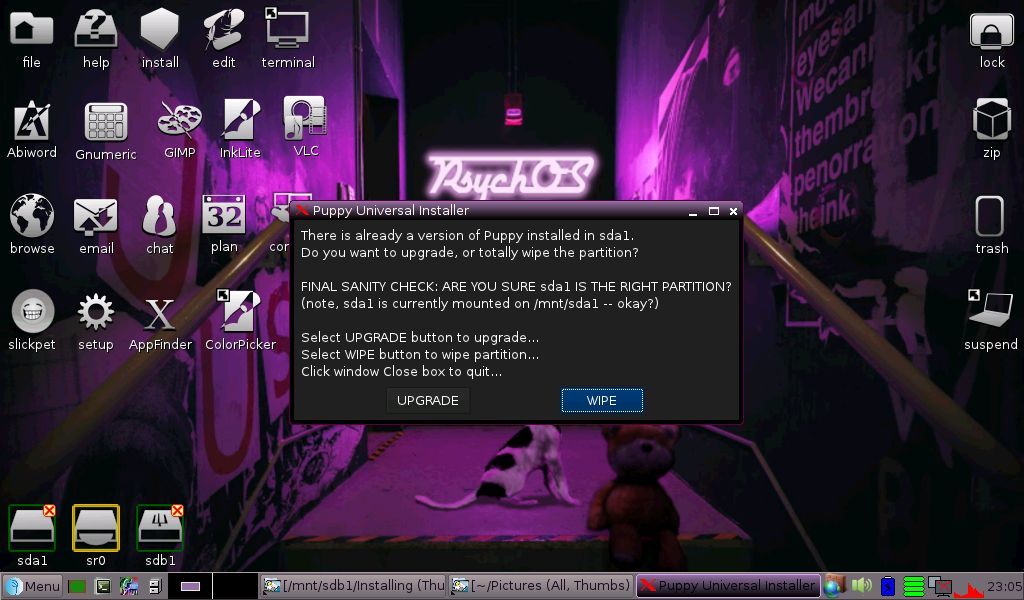
Choose "Upgrade" if there is a newer release of PyshchOS486 but if installing for the first time, and are okay with wiping the contents of the selected partition in Step 04, select "Wipe".
Step 08 - And now we wait...
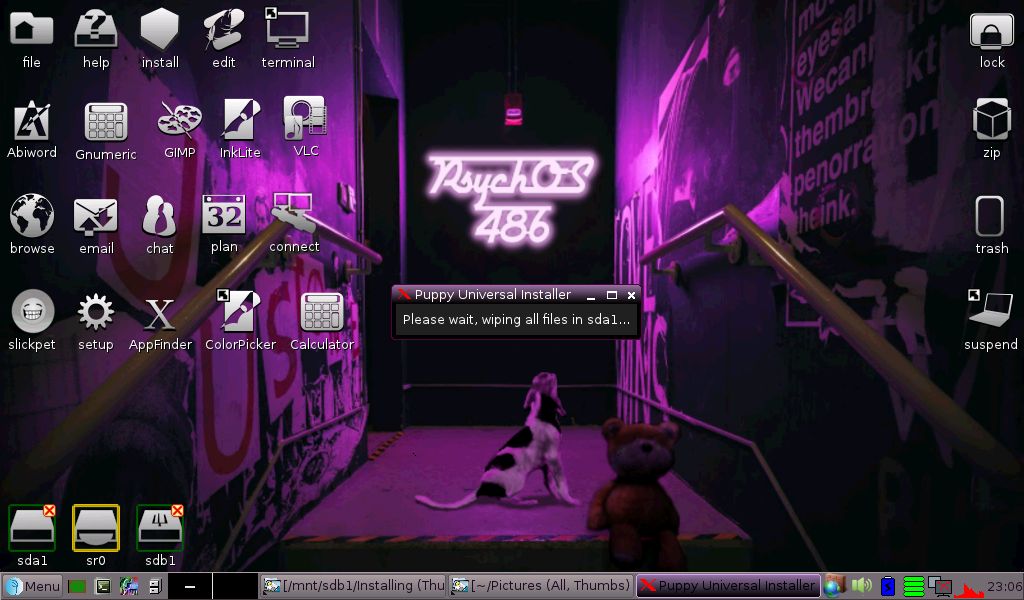
After clicking "Wipe" in the previous step, you must wait for the installer to wipe the files on the selected partition.
Step 09 - And wait some more...
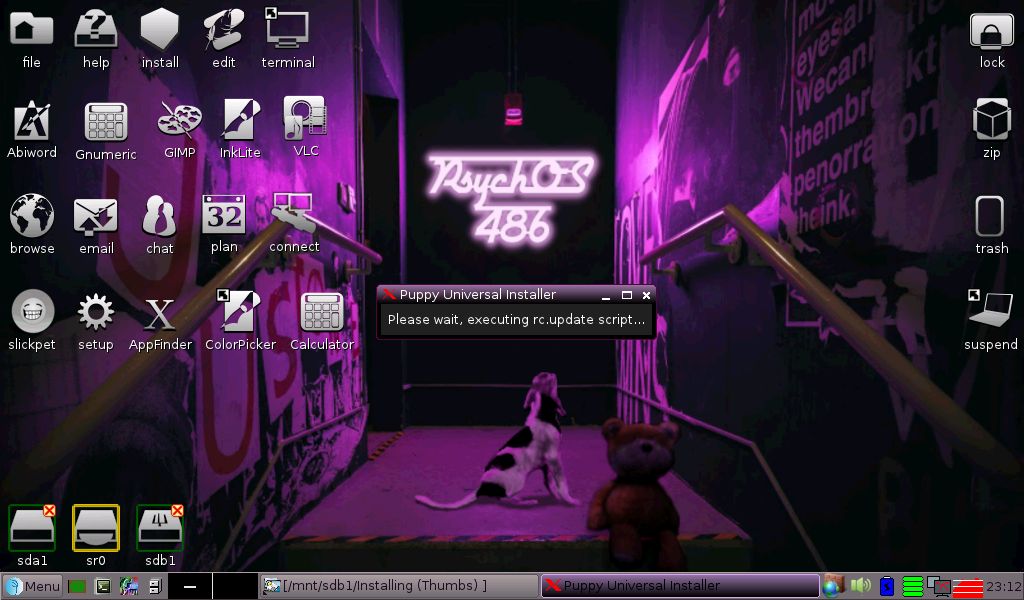
The rc.update script gets executed, usually followed by what appears to be a finished installation since no windows have popped-up in a while. Do not be fooled. The installation is technically finished only after a Grub Howto-like text file and window shows up and do not skip the Grub setup process.
Step 10 - Puppy's Grub Howto
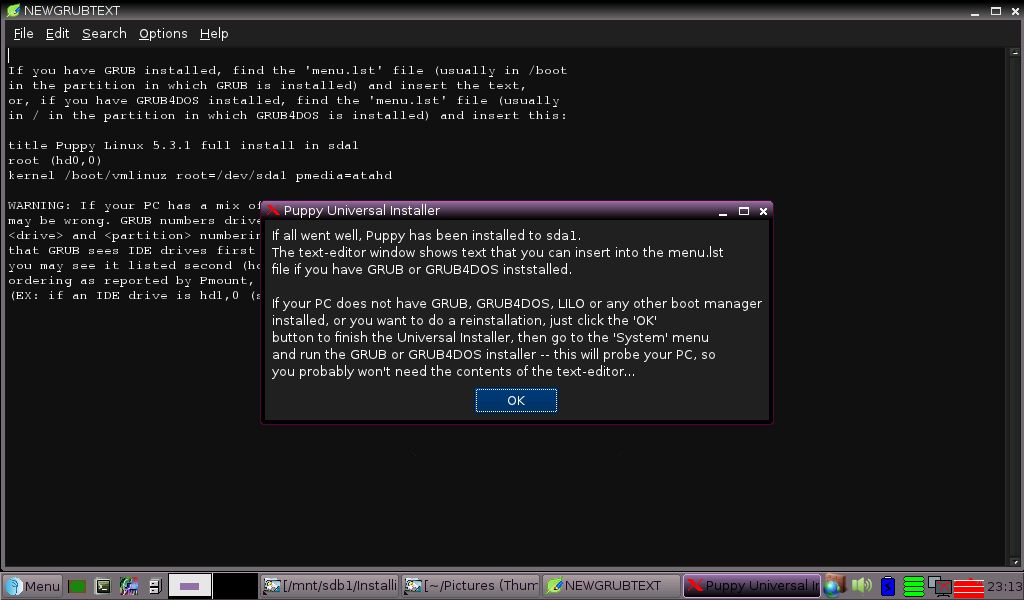
Some instructions on how to setup Grub will show up, but you can just close both of these windows and move on to the next step.
Step 11 - Grub Legacy bootloader config
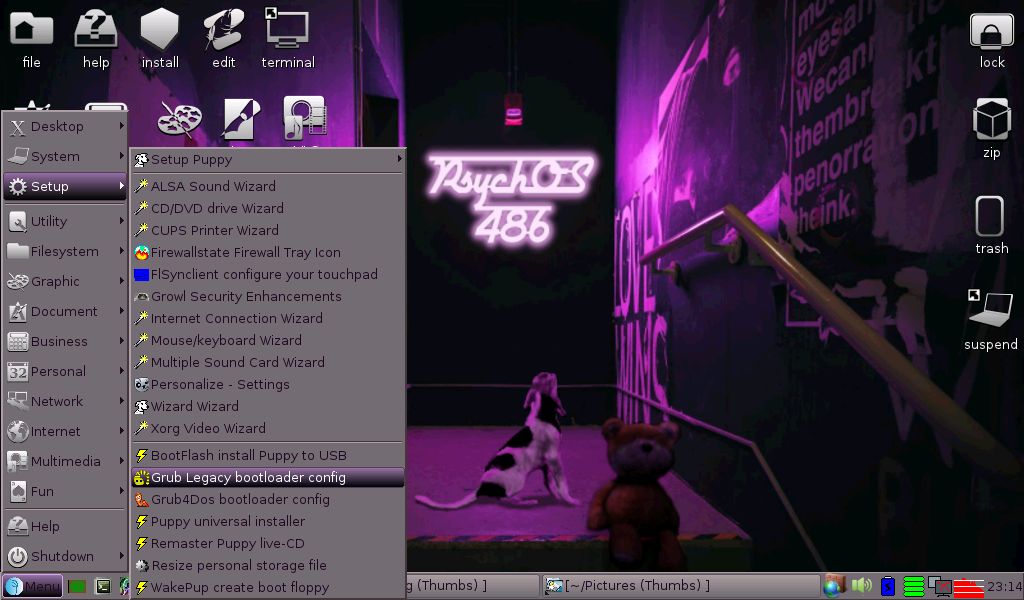
Select "Grub Legacy bootloader config" from the applications menu.
Step 12 - Keep your Grub "Simple"

Select "simple" when the GRUBCONFIG window asks. These installation instructions assume a single GNU/Linux distribution install on a single partition, so "expert" is not needed.
Step 13 - Framebuffer or not?

Based on lots of testing with a few programs that use the framebuffer, I would just select "standard." Worse case scenario, just run 'xorgwizard' while in the console if something isn't loading right as this is not done for you first thing like on many other Puppy-based distros to help save resources for the i486DX users.
Step 14 - Tell Grub where the system is
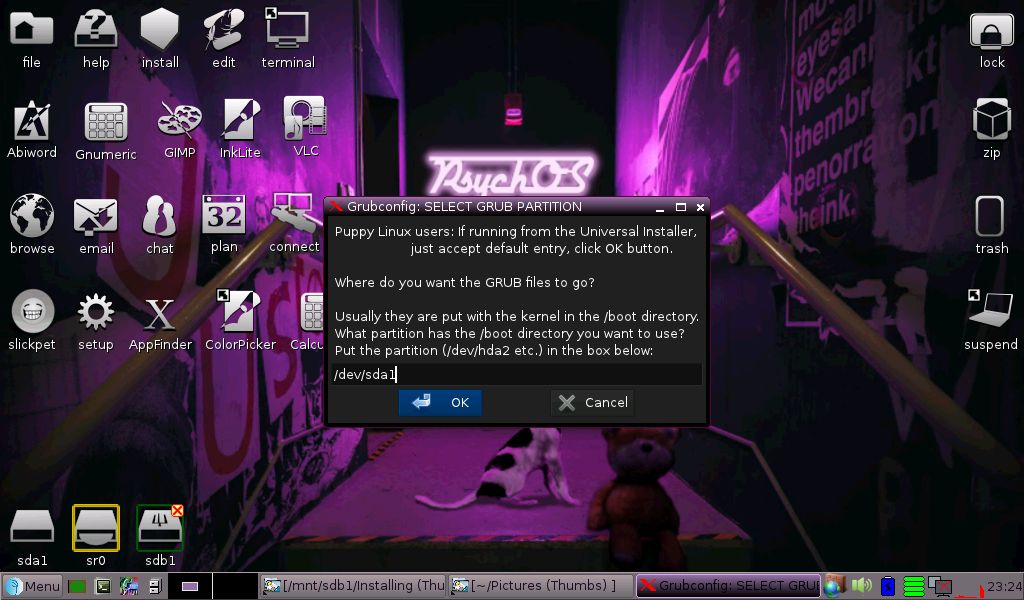
Assuming that you only have one partition on one hard drive, you probably are going to enter "/dev/sda1" when the Grub configuration wizard asks where to put the Grub files.
Step 15 - Just pick MBR

For whatever reason, the Grub configuration wizard thinks the "MBR" option for where to be installed might be "unsafe." I've not had problems with this.
Step 16 - If you see this, leave it empty

If multiple hard drives are detected, including USB storage devices, a window will ask about installing Grub to other hard drives. You can leave this blank.
Step 17 - Grub successfully installed
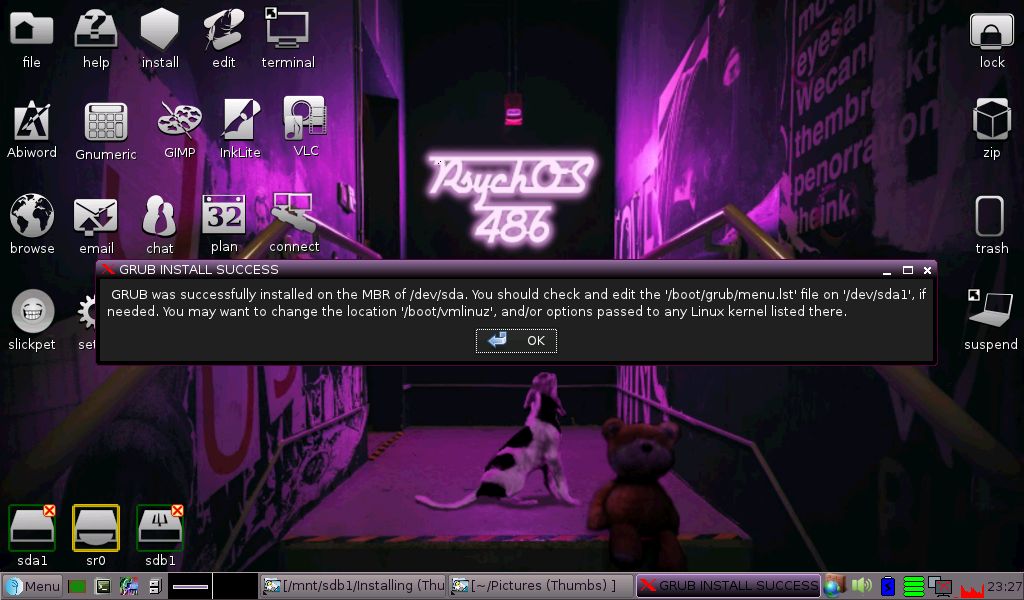
A "GRUB INSTALLATION SUCCESS" window should pop-up and just click "Ok". You are now done and can reboot the computer. I would remove the CD-ROM from the machine while it turns on to prevent it from booting off of the disc again.